
Note: this build was all me. I did it before I started using Claude, so I was on my own for this one. Claude did help me write it down and proofread it, because writing has never really been my thing.
It started with the granny charger that came with my old Leaf. It nearly burned down my garage.
I walked into the garage one day and the FAULT light on the charger was on. Confused as hell, I went to check and unplugged everything. This is what I found:
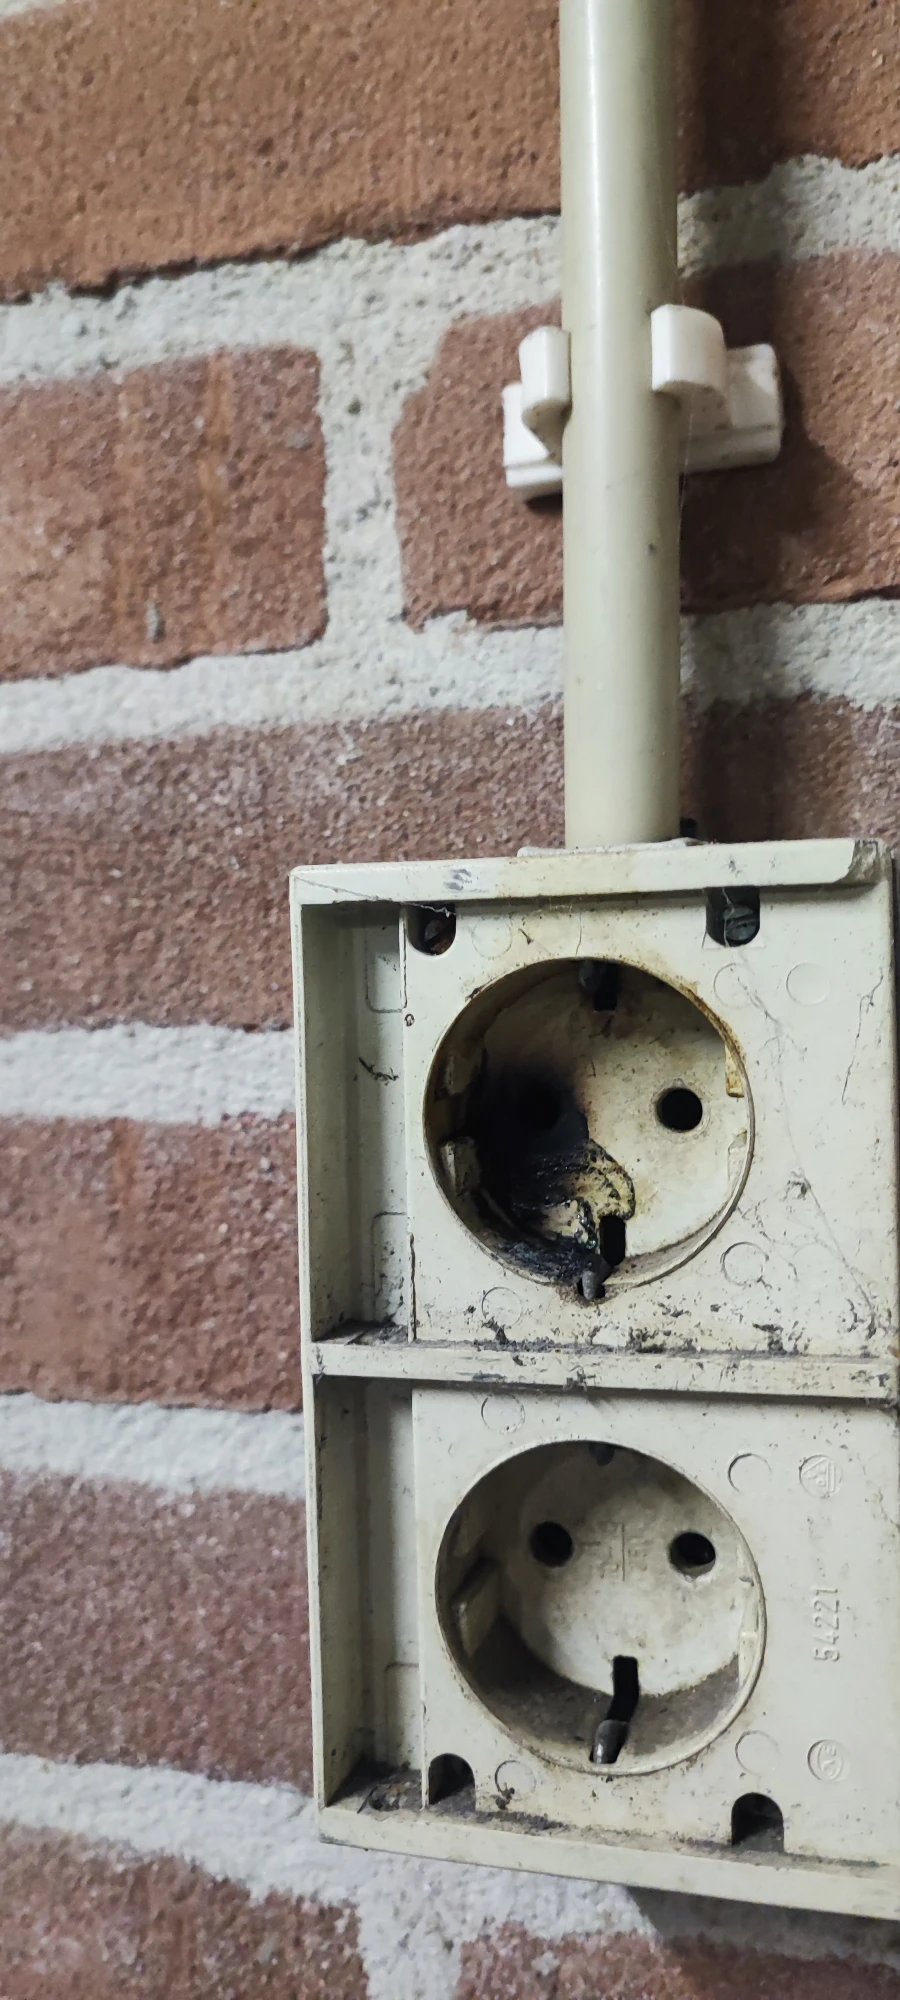
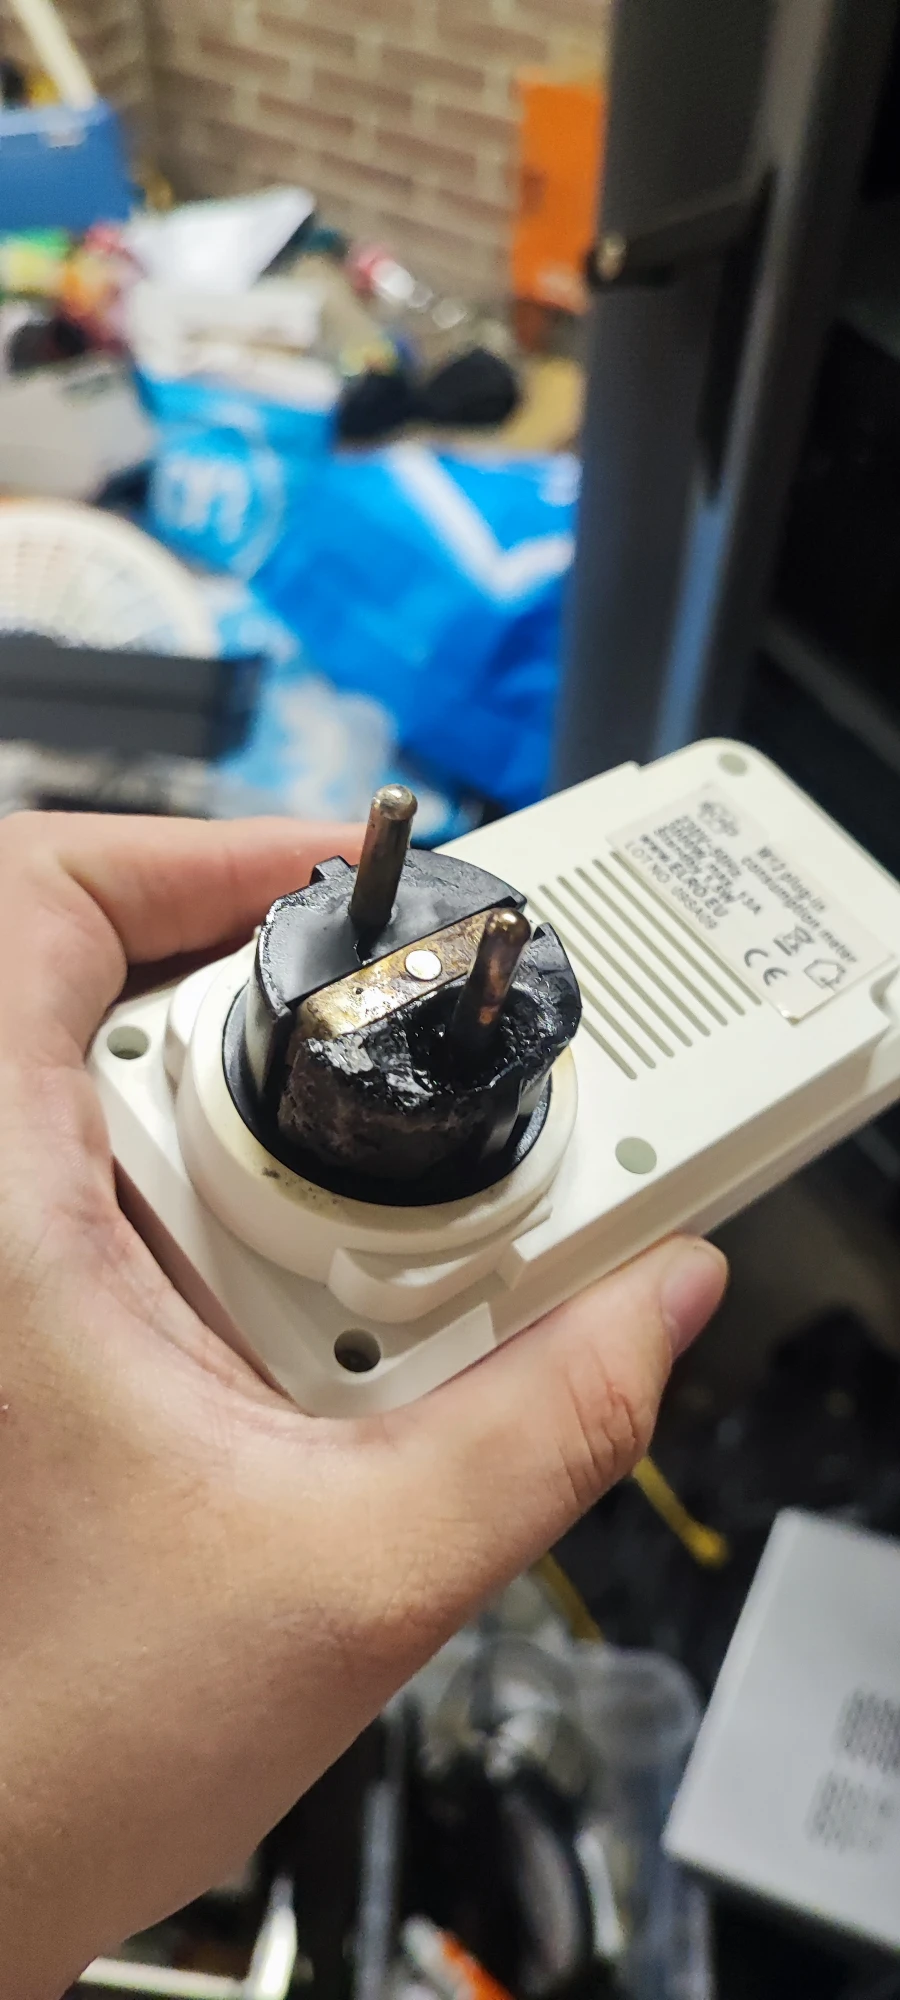
The setup was simple: the charger went into a cheap plug-in energy meter, so I could see what each session used, and the meter went into an old socket in the garage. The charger pulls 10 A, for hours at a time. On paper that’s fine: the meter is rated for 13 A and the socket for 16 A. In practice, hours of 10 A through a cheap plug and a tired socket turns into a lot of heat in a very small spot.
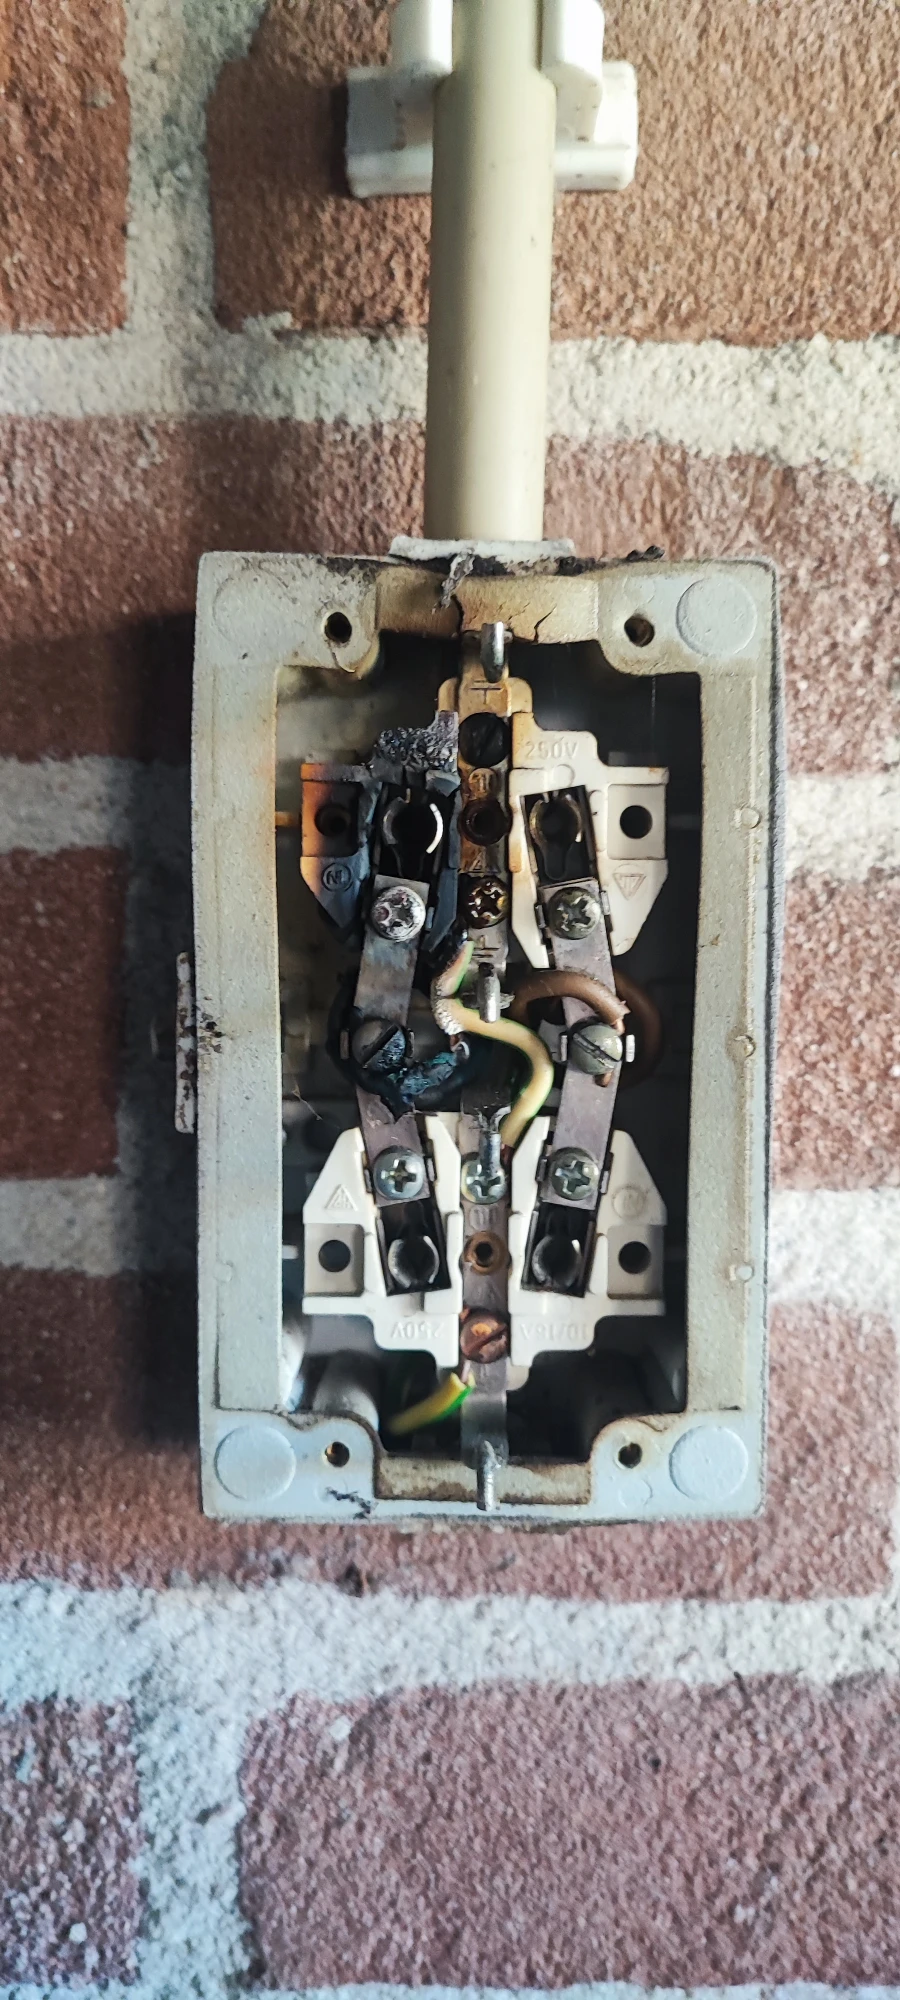
Opening the socket up afterwards showed how close it actually got. The contact had cooked, and the insulation on the wire next to it had melted.
Lucky that’s all it did. So yeah: time to upgrade to something proper.
A €50 EVBox
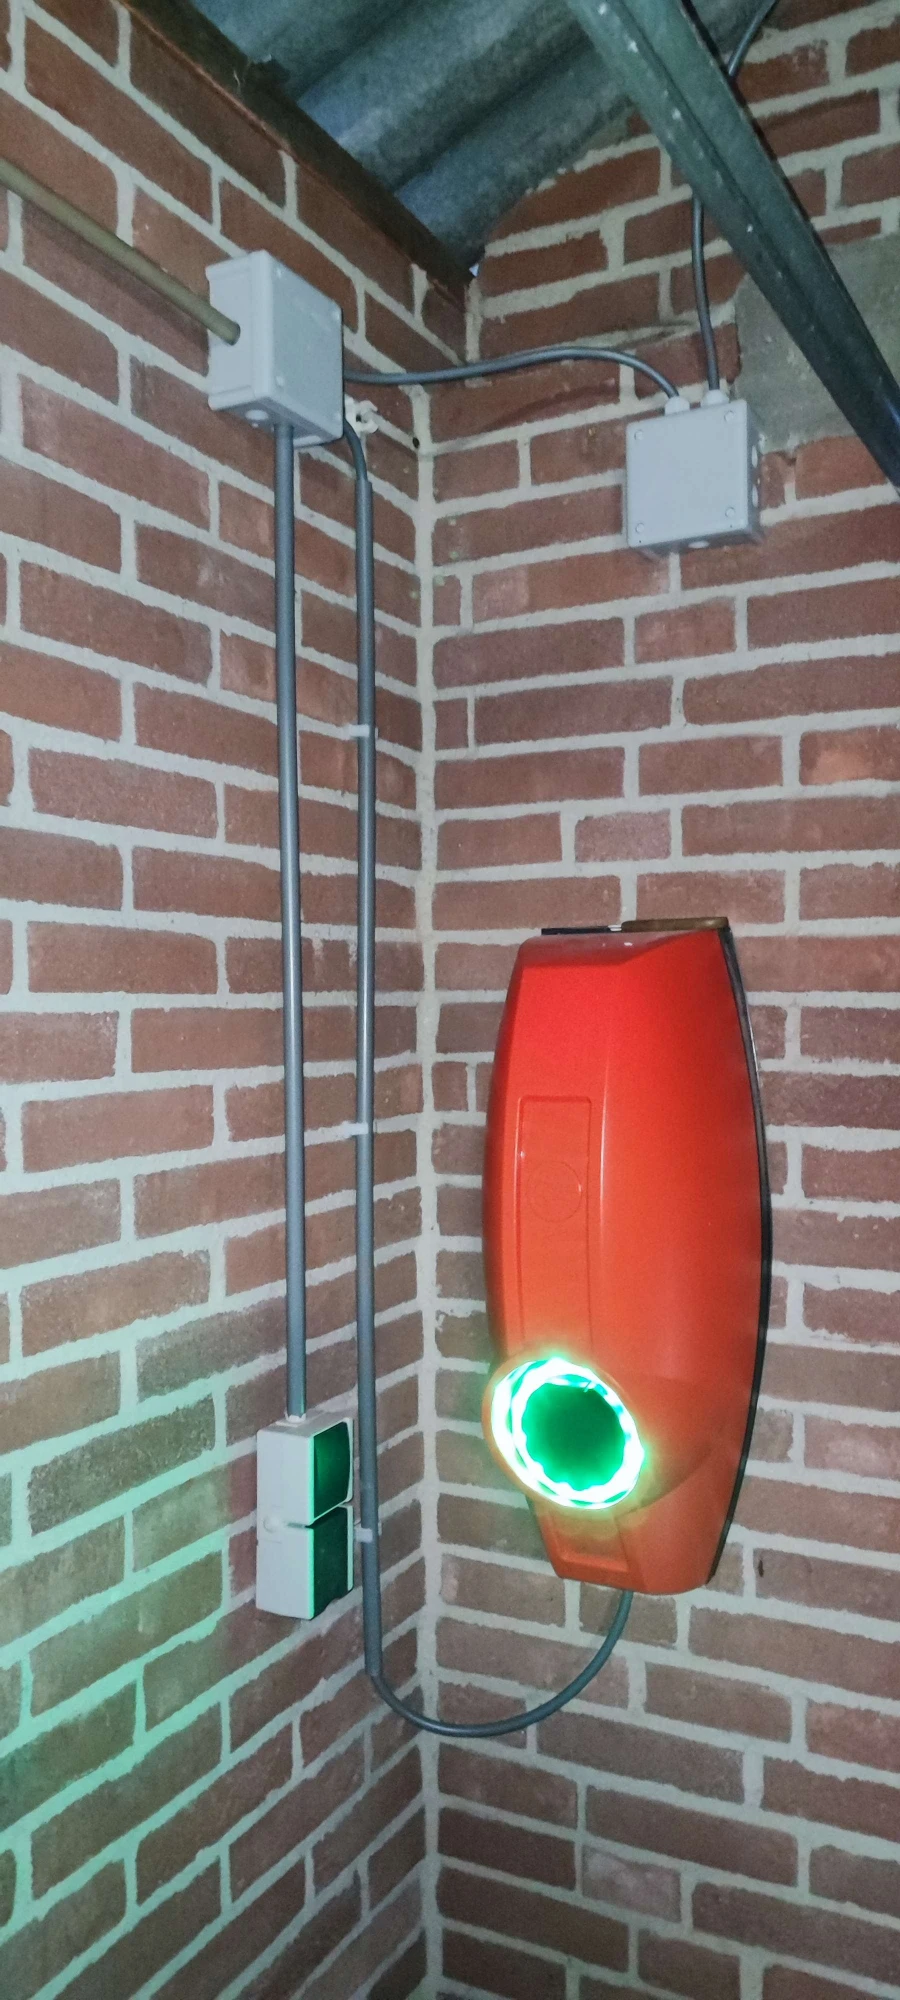
A new wallbox cost several hundred euros at the time. Instead, I found a second-hand EVBox BusinessLine on Marktplaats for €50, back at the end of January 2023. It came from an old ING office, which is why the cover is bright ING orange. (Still need to paint that thing.)
What was inside
Opening it up, there wasn’t much to it:
- the controller: a big black box (and I mean that literally, it’s a big black rectangle)
- a small kWh meter
- a mains switch
- a contactor
- a 12 V power supply
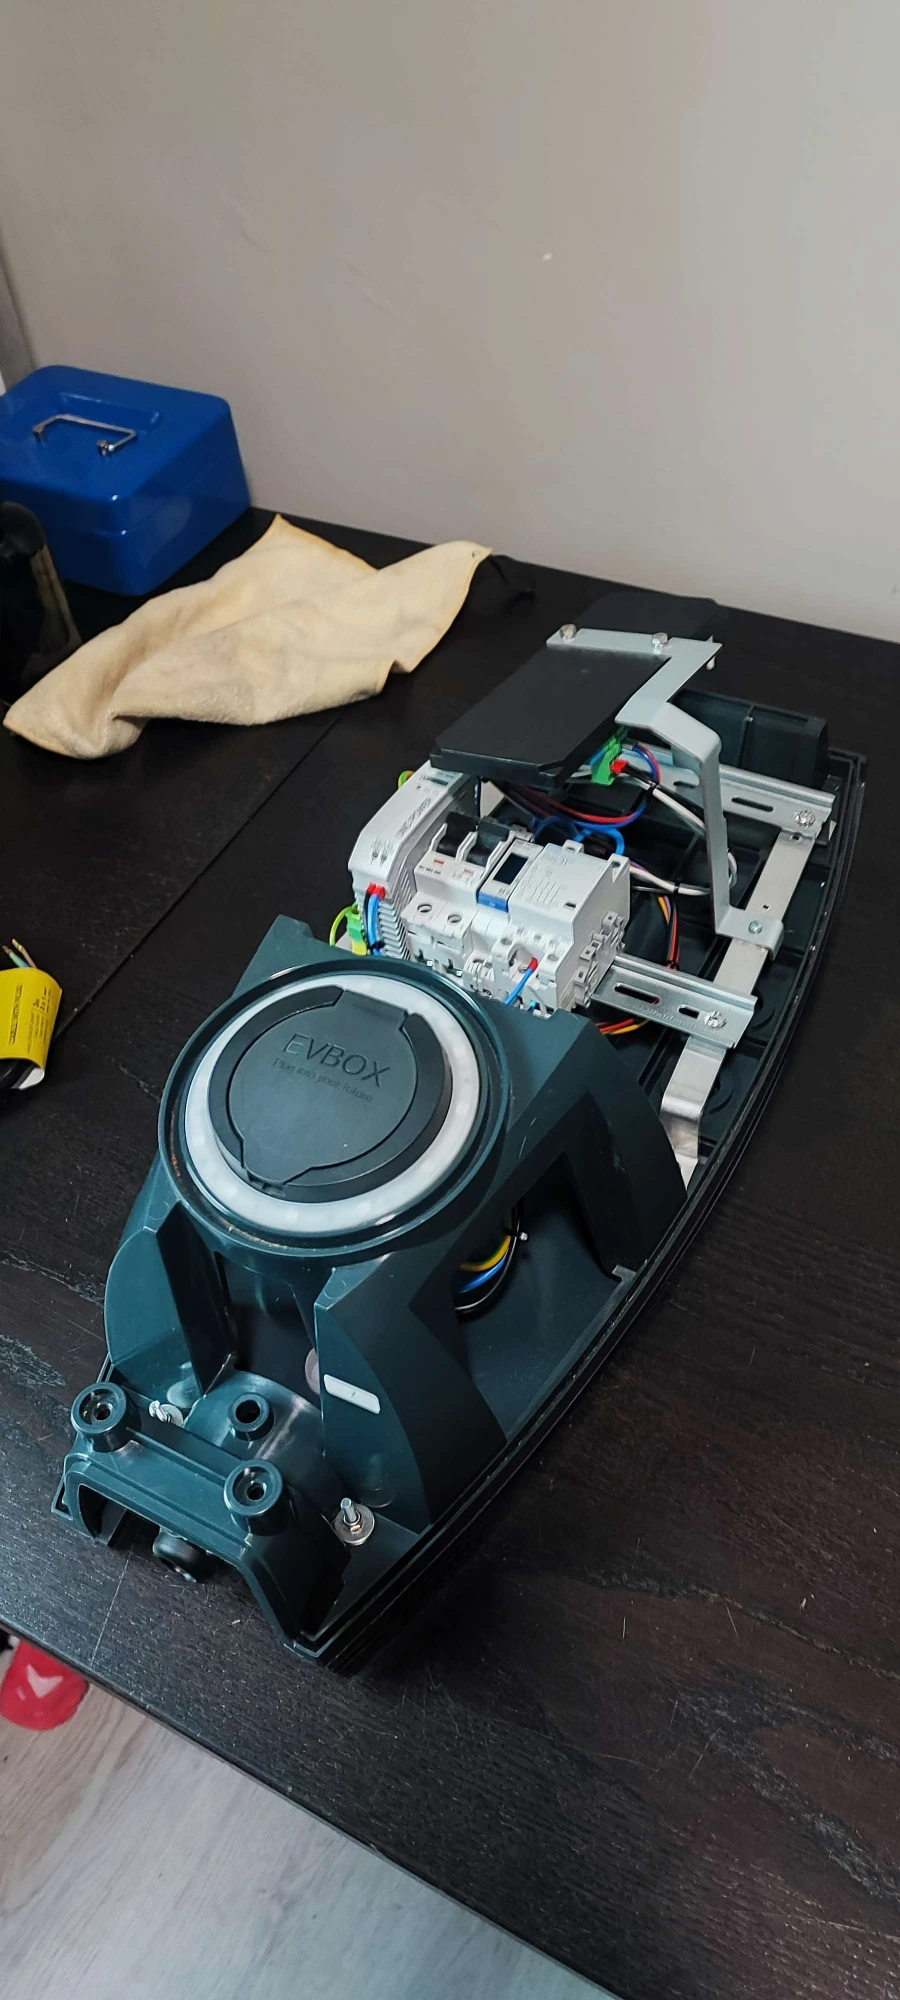
The basic hardware was fine. The part that made it an EVBox was the controller, so that’s what had to go.
New brains: SmartEVSE
The big black box got replaced with a SmartEVSE v3 from Stegen.
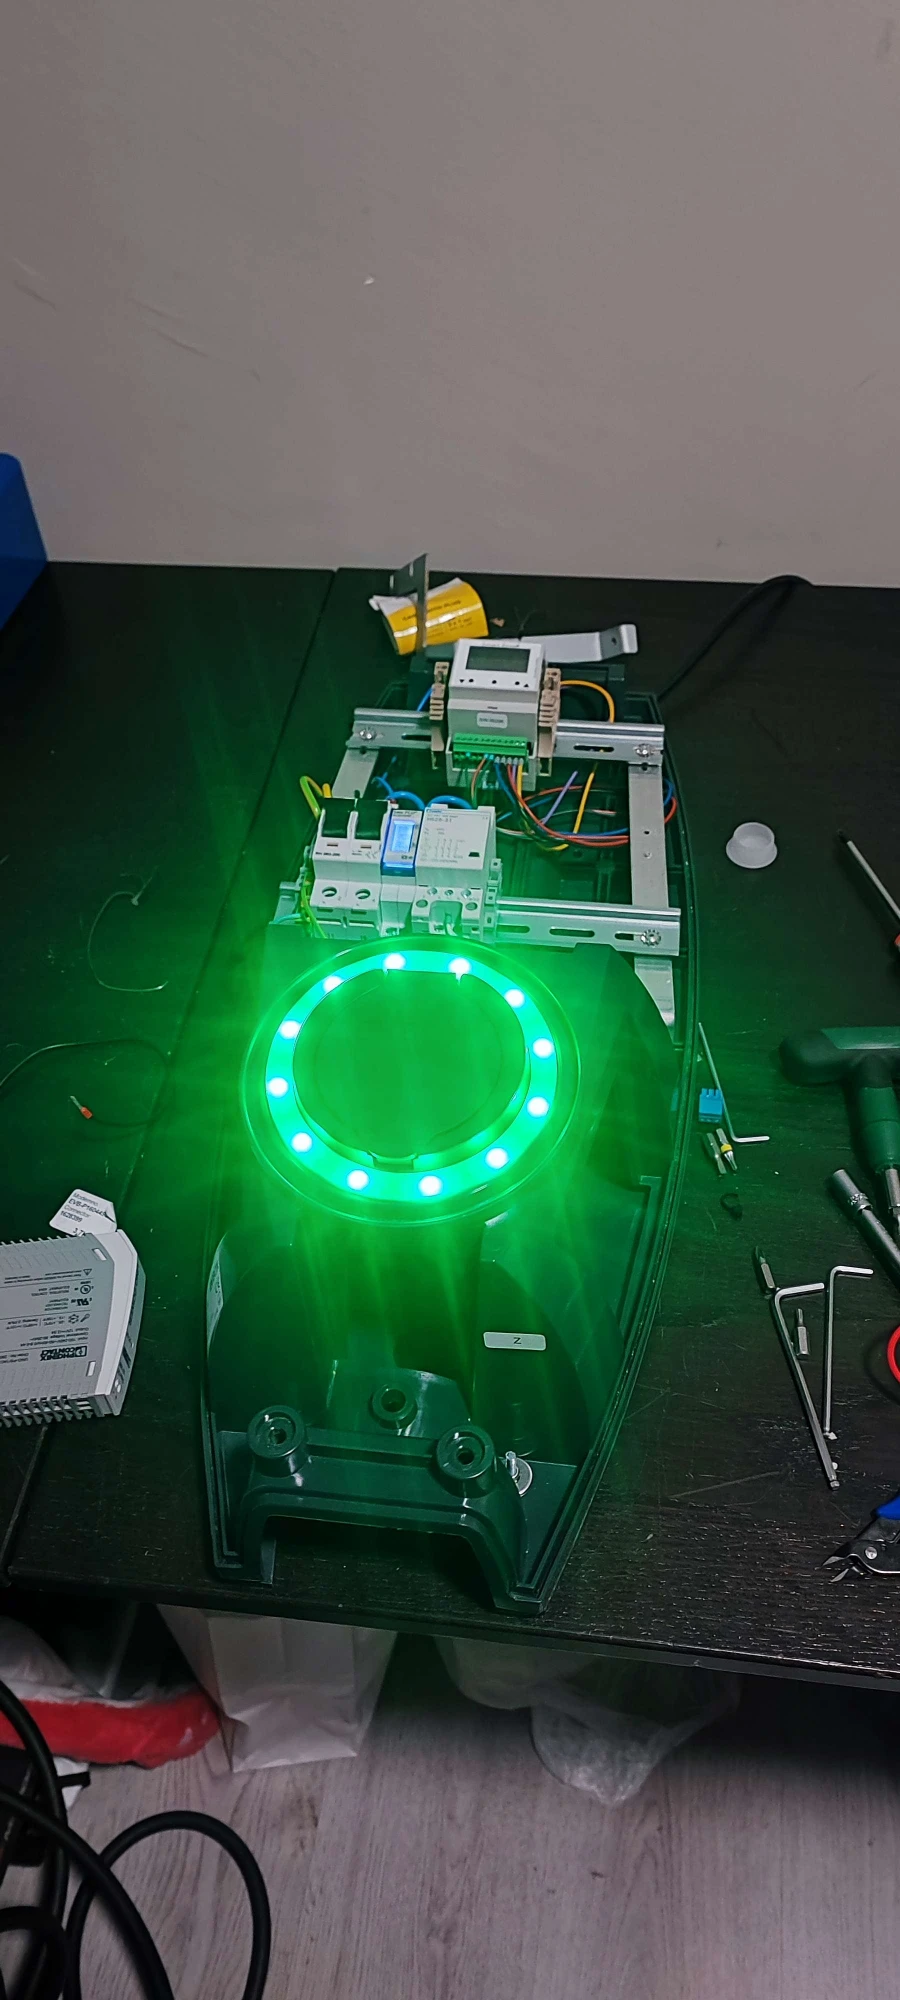
The original LED ring is wired to the SmartEVSE through its RGB wires, so the full ring still works. And that thing is BRIGHT. My whole garage lights up when it’s charging. I got lucky there too, because those EVBox LED rings are known to fail.
Somewhere around June to August 2025 I also swapped the old meter for an Eastron SDM630 Modbus V3 and connected it to the SmartEVSE. Now I can see exactly how much each charging session used.
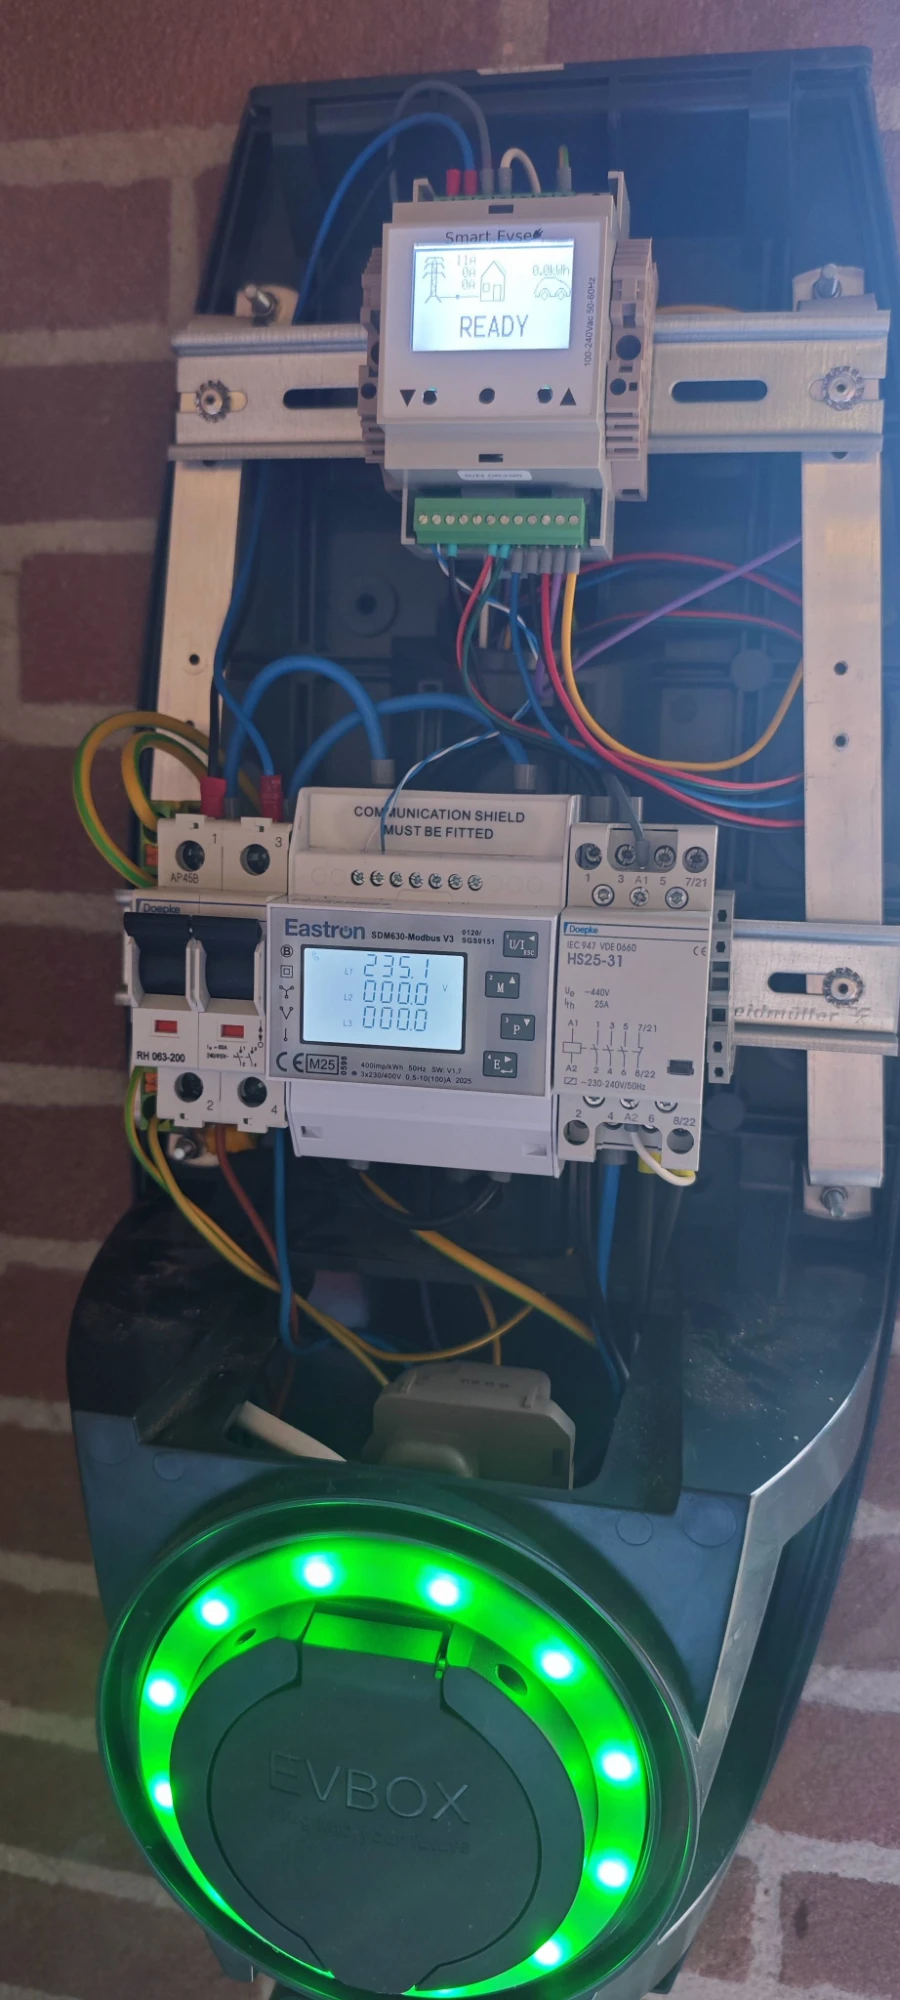
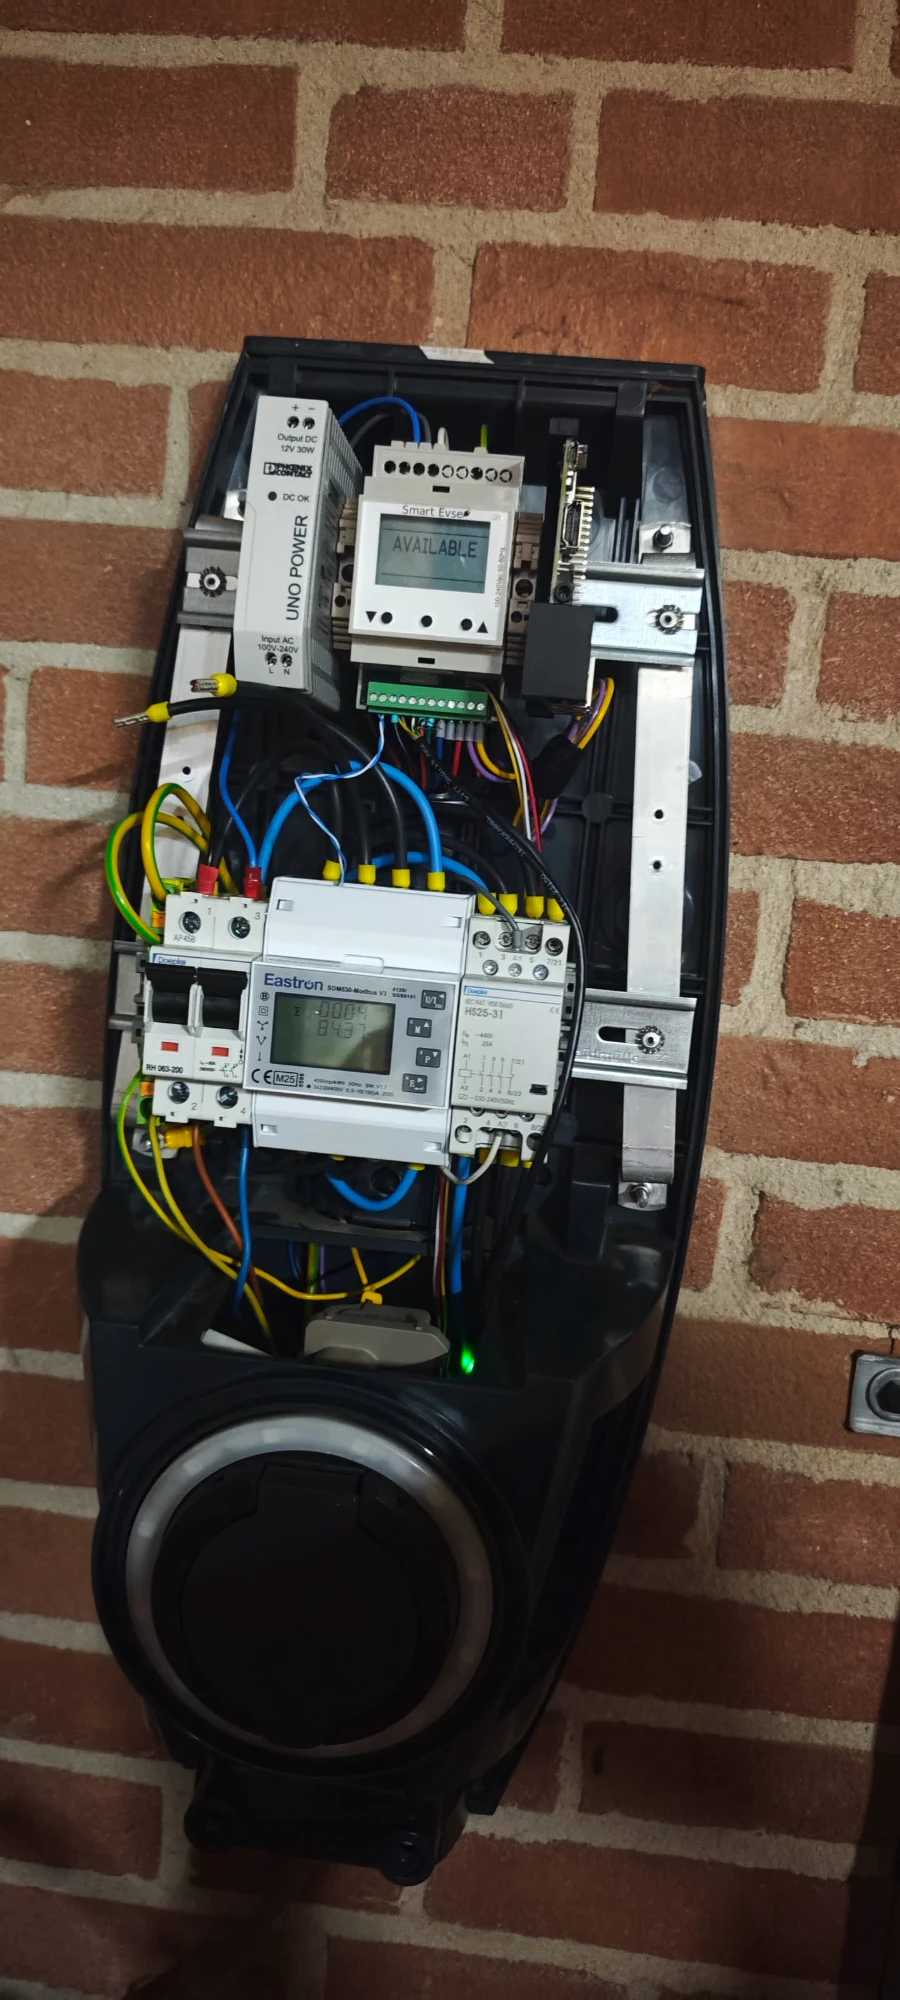
Later on I went back in and rewired the whole thing in 4 mm² cable. (In the photo below, the old 12 V power supply was still in there, powering a Raspberry Pi. I wanted to try ISO 15118 to read the car’s state of charge, but I’ve parked that idea for now and taken the Pi out.)
RFID and guest charging
I added the RFID reader from Stegen’s site, so the charger reads official charge cards and tokens. That’s not just for locking it: it means guests can use their own card and get billed for it. The billing side is handled by Tap Electric over OCPP.
Load balancing
The SmartEVSE also does load balancing, so charging the car doesn’t overload the house connection. I’ve got a WaterP1MeterKit from SmartHomeShop.io on my smart meter, connected to Home Assistant. Home Assistant publishes the house’s usage in real time over MQTT, and the SmartEVSE adjusts the charging current to match.
Safety
Since the charger hangs off my existing garage electrical system, I added a DC/AC residual current sensor from Stegen, the RCM14-03. A regular RCD can’t reliably detect DC fault currents, and an EV charger can produce those, so this one watches for both.
I fitted it during the rewire, and my god, routing the three phases and the neutral through it was a pain. All four cables have to pass through the sensor’s hole, and they barely fit. Literally barely.
Upside: I didn’t even have to mount it. The cables hold it in place, and it really isn’t going anywhere.
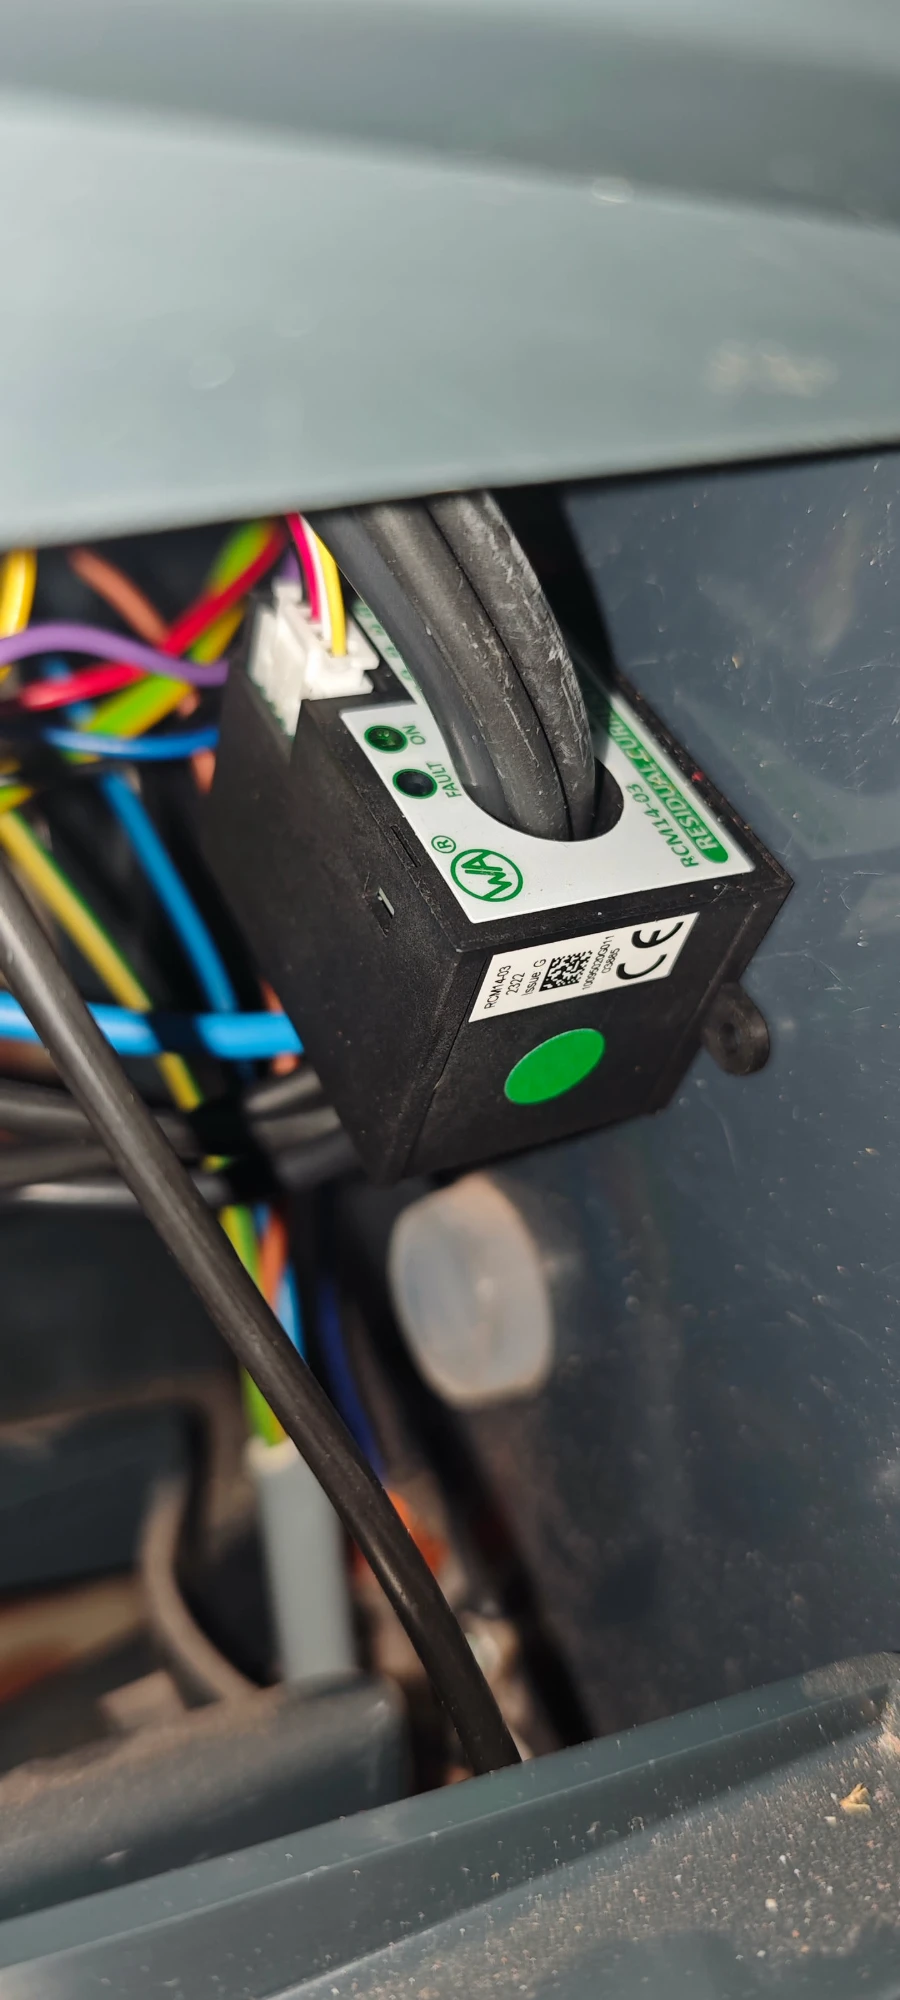
Recently someone from Exexis was over, and while we were chatting I asked him to have a look at it. He was positive about it, no complaints.
Disclaimer: I’m somewhat trained in this, but not everyone is. This is mains voltage, on three phases. If you’re not sure what you’re doing, get an electrician.
What it cost
| Part | Price |
|---|---|
| EVBox BusinessLine (second-hand) | €50 |
| SmartEVSE v3 | €150 |
| Eastron SDM630 Modbus V3 meter | €99 |
| RCM14-03 residual current sensor | €59 |
| RFID reader | €29 |
| Total | €387 |
The cable for the rewire I got for free from someone I know, so that’s just a few small bits on top. Back then a brand new charger was €500 and up, and I know exactly what’s inside mine.
Where it’s at now
It’s been running since the end of January 2023, and these days it charges my Hyundai Inster. It’s set to 15 A, because the cable to my garage is only rated for 16 A, and it’s pushed 4109 kWh since the Eastron meter went in.
It hasn’t been perfect, though. Every now and then it loses its Wi-Fi connection. No Wi-Fi means no OCPP, so card authentication stops working and nobody can start a charge. The only fix so far: a hard reboot of the whole thing.
So that’s the next upgrade: installing the new Ethernet module and hardwiring it. And after that, finally painting that orange thing.